How To Make a Rain Gauge

How To Make A Rain Gauge

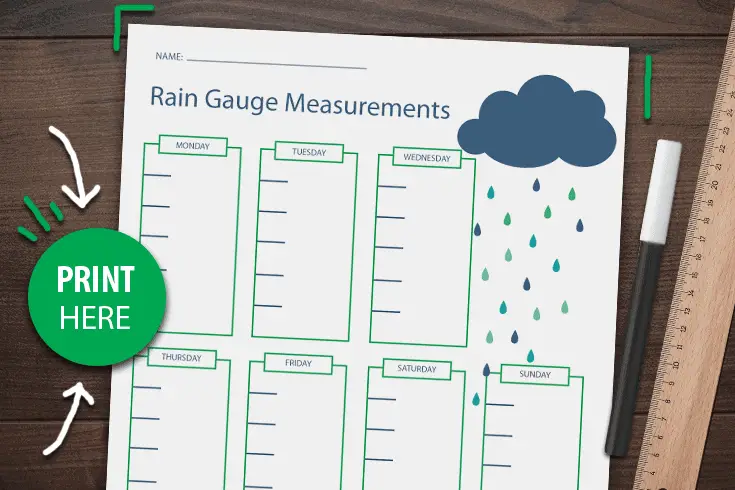
Making a rain gauge is an easy and quick activity to do with your kids using just a few things from around your house. We have a  fun and free printable to help your kids track how much rainfall your rain gauge catches each day.

make a rain gauge

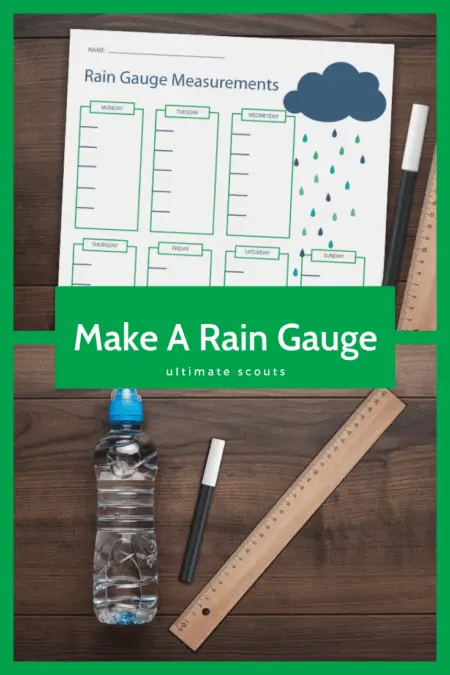
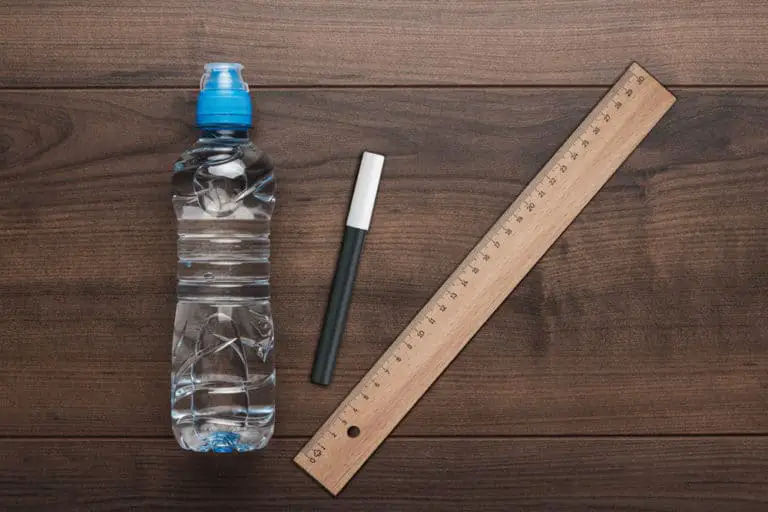
In the Wolf Elective Adventure, Code of the Wolf, one of the activities you can do to earn your belt loop is to make a rain gauge. It only takes a few simple items from home and you are ready to measure rain fall.

What Is A Rain Gauge?

  • A rain gauge is an instrument that measures how much rain falls in a 24 hour period.
  • The width of a professional measuring device used by weather stations measures 8″ in diameter so that it can better catch the rain that is falling.

Tips For Using A Rain Gauge

  • Once you have made your measuring instrument you will want to be sure to place it far from sides of buildings, solid fences and trees.  Pretty much anything that would block the rain from falling into your gauge.
  • Your gauge should be read every day around the same time. If you read it at 10 am on Monday morning be sure to read it at 10 am on Tuesday morning.
  • To see how much rain has fallen you will want to bring your eye level to the water’s surface. This will give you a more accurate measurement.
  • To keep track of the rainfall each day you can use our Free Rain Gauge Journal to record your findings.

Supplies You Will Need To Make Rain Gauge

  1. Clear Bottle (water bottle, Mt. Dew bottle)
  2. Permanent Marker
  3. Ruler
  4. Rocks or Pebbles
  5. Rain Journal (if you want to track it each day)
make a rain gauge supplies

How To Make A Rain Gauge

Follow along with this video to see how to make a rain gauge.

*Tip* – Place rocks or pebbles in the bottom of your bottle to keep it from tipping over. Fill water to just above the rocks and mark that spot as 0″. You can now measure any rain fall from that measurement.

checking rain gauge

MORE TO EXPLORE